In modern mass production of products, due to limitations in technical efficiency and other reasons, the size inspection of most products is random inspection, including the number of inspection positions of the sample and the number of inspection samples. With the development of technology, full-size inspection or full-batch inspection is becoming an actual demand for production line inspection.
Huano's three-dimensional automated blue light 3D inspection system can quickly obtain accurate and complete three-dimensional data of the tested parts through structured light area array three-dimensional scanning technology. The three-dimensional data can then be imported into professional inspection software, and compared with the design data, the chromatogram can be obtained. The shape and position deviation can be displayed visually.
The automated blue light 3D inspection system has excellent motion control functions and can quickly obtain three-dimensional surface measurement data. At the same time, it is not affected by the external environment and supports real workshop on-site operations, allowing users to directly identify and mark deviation positions and 3D full-size inspection results. More intuitive.

Automated blue light 3D scanning solution
The automated blue light 3D scanning measurement system supports multiple types of measuring heads, including line scan, area scan, ball scan, etc., covering industrial cameras from 3 million pixels to 12 million pixels, and can be matched with small to large format measuring heads to provide various precision Provide support for the implementation of automated 3D inspection of parts.
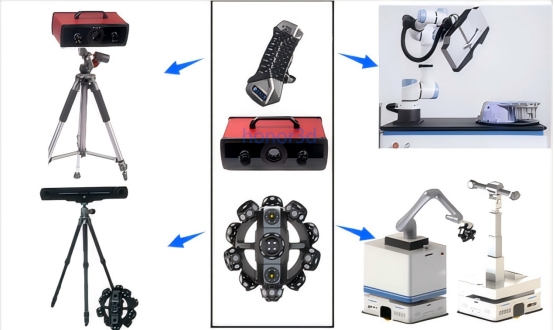
Typical application cases of automated measurement
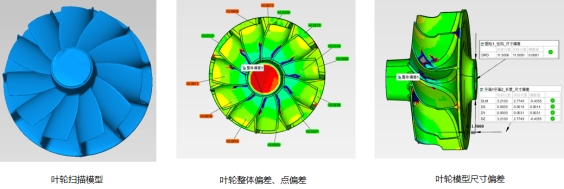
Impeller automatic inspection
Testing requirements:
The diameter of the workpiece is within 150mm, the height is within 100mm, and the mass is within 5Kg
Detect overall deviation, dimensional deviation, and geometric tolerance
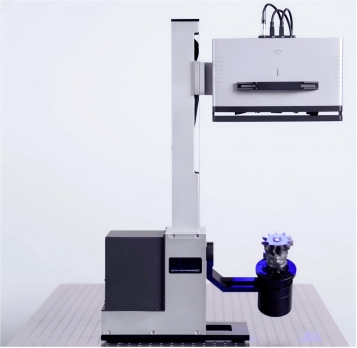
Blue light automated 3D detection (two-dimensional automation)
Solution:
Use blue light 3D scanning measurement system: realize automatic detection through teaching scanning, intelligent supplementary scanning, template creation, template detection and other functions. Use single and binocular hybrid scanning to achieve the integrity of impeller root data, customize fixtures, and quickly load and unload materials. .
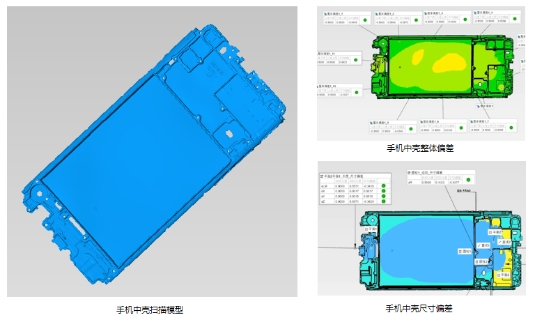
Automatic 3D inspection of mobile phone mid-frame
3D size inspection requirements:
The length of the workpiece is within 150mm, the thickness is within 1mm, and the mass is within 1Kg
Detect overall deviation, dimensional deviation, geometric tolerance, thickness
Solution:
Use blue light 3D scanning measurement system: realize automatic detection through teaching scanning, intelligent supplementary scanning, template creation, template detection and other functions.
The global point method is used for front and back splicing, and the scanning accuracy is higher.
Customized frame (including global points) for fast flipping and loading and unloading.
The grayscale eigenvalue method is used to fit the hole positions with higher accuracy.
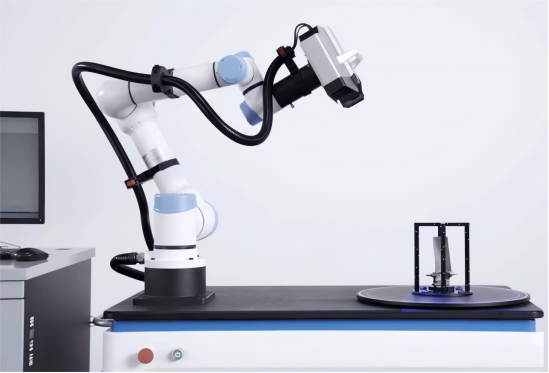
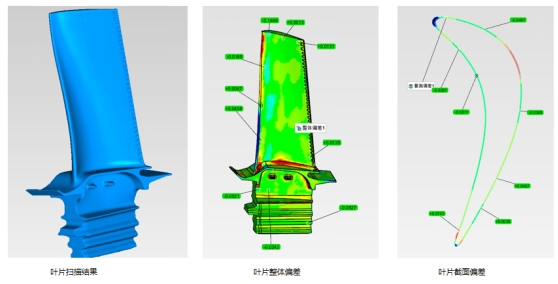
Collaborative robot-automated 3D inspection of aviation blades
Testing requirements:
Workpiece size: length, width and height within 400mm, mass within 10Kg
Manual loading and unloading
One-click automated scanning and detection, report output
The surface cannot be powder sprayed or dotted, and the edges and small round holes must be scanned completely.
Detect overall deviation, dimensional deviation, and geometric tolerance
Solution:
Using a blue light 3D scanning measurement system to achieve automated inspection with a robot arm
Customized fixtures and scanning frames for fast workpiece changes
Grayscale feature values are used to fit the hole positions with higher accuracy.
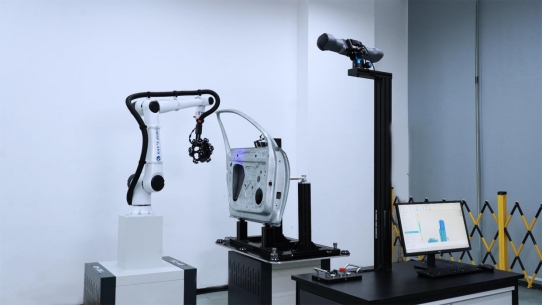
Robotic sheet metal automated 3D inspection
3D size inspection requirements:
The length, width and height of the workpiece are within 1.5m and the mass is 100Kg
Quick loading and unloading
One-click automated scanning and detection, output report
The data of round holes, slots and boundaries are clear and complete
Hole size detection, boundary detection, overall deviation detection
Solution:
Use the blue light 3D scanning measurement system to realize automated inspection through teaching scanning, motion simulation, template creation, template detection and other functions
The round hole is fitted using grayscale eigenvalue algorithm to achieve higher detection accuracy.
Customized frame: Sturdy clamping, easy and fast loading and unloading using a forklift, and double-sided scanning is possible.
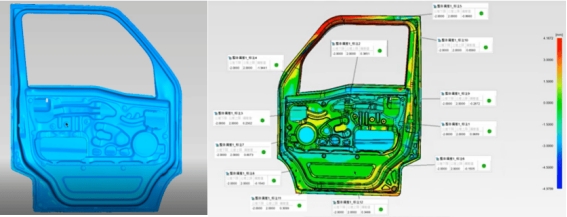
Automated blue light three-dimensional scanning inspection system, the measuring head covers the 80~800mm format, and can be flexibly matched according to the measurement needs. It is suitable for quality inspection of various manufacturing methods and materials such as injection molded parts, sheet metal parts, forged castings, molds, etc., bringing high efficiency The detection efficiency and high-precision detection results can meet the requirements of batch automated 3D industrial detection applications.